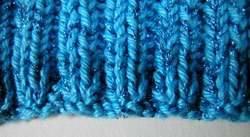
Here’s what I did with the Buttons yarn using the Simple Baby Socks pattern in The Magic Loop booklet. I highly recommend this booklet if you’d like to learn how to knit socks with one circular from the cuff down and from the toe up.

These socks are knit from the toe, using a figure 8 cast on which can be a challenge to manage but produces the best sock toe. Last week I tried starting these socks while riding the bus but gave up after several attempts. It’s definitely a task that needs to be done in a comfortable environment.
Keep in mind that this cast on is not only great for socks, but can also be used for other circular items such as hats.
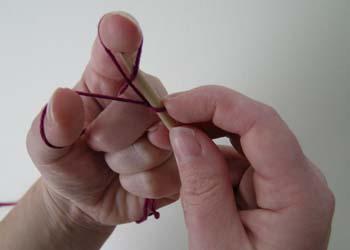
Here’s how the cast on is started on two circular needles. The yarn is wound around two needle tips in a figure 8 fashion.
[Note: 4/9/2006 – I just noticed that this picture is wrong. The yarn end should start be under the lower needle (left side of photo) and then wrapped up over the upper needle. When I get a chance, I’ll change the photo. Athough, I think it’s still possible to wrap the needles this way. Just be sure not to twist stitches as you knit them.]

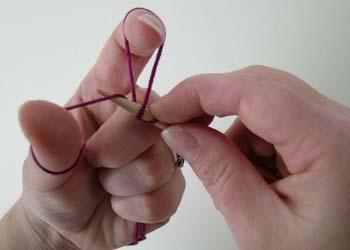
Once the yarn is wound around the needles, I start knitting through the back loop of all the stitches on the top needle. It’s important to remember to correctly wrap the last stitch on the bottom needle when starting on the top row so that another stitch is formed on the bottom needle.

Now I switch the bottom needle to the top and knit (not through the back loop) each stitch on this needle. Notice that I’m holding the yarn tail between the fingers of my left hand so that the last stitch on the last needle doesn’t get messed up.

Here’s the first round finished. I can now knit in a circle, increasing at the end of each needle as needed.

When the circle is a little bigger I tighten the first row stitches by starting on the opposite side of the tail (which is on the left when looking down at the toe from the top of the sock) yanking on the stitches one at a time to move the slack from one stitch to the next until I reach the tail.
 I’ve been diligently working on the left mitten and arrived at the point where the thumbhole should be. The round starts on the left side of the palm so the thumbhole is created while working on the last half of the stitches on the first needle (I’m using two circulars instead of double point needles).
 On the first needle I knitted the first 25 stitches according to the chart (25% of the stitches on this needle minus plus 1). I then started the top of the hole by using a loop cast on to add 22 new stitches while still following the chart. Lizbeth Upitis calls this cast on a half hitch but I found a good illustration from