Pieces

phil_pieces.jpg
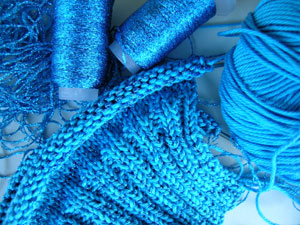
I’m working both sleeves at the same time and will soon start shaping the sleeve caps.

Check out the Morris Fern sweater on Anne Modesitt’s blog. I’ve been anxiously waiting for the winter issue of Interweave Knit ever since I saw a small preview of this sweater on her blog. Sadly, it didn’t make it into this issue but will be offered via a subscriber only link. This really bites. I don’t subscribe to any of the knitting magazines because most are not worth $6 (especially Vogue Knitting). Ok, I will admit to buying an issue for only one pattern, but kind of feel cheated when I do this. Now, they want me to plunk down $24.

Update: I decided to subscribe to Interweave Knits and sent them an e-mail letting them know that it was because of Annie’s sweater. I received a reply from Pam Allen (the new editor) and she said that they knew her sweater would be a big draw. Hopefully the new on-line content combined with the magazinewill be worth the subscription. I just hope they don’t try this with their other magazines. I doubt that I would subscribe to more then one.

Purl Long Tail Cast On

I combine this cast on with the regular long tail cast on when doing knit 2, purl 2 ribbing. DnT has an animated version of the regular long tail cast on.

I first heard about this cast on in a sock knitting class and found references to it in “The Principles of Knitting” by June Hemmons Hiatt and “Latvian Dreams” by Joyce Williams.2x2edge.jpg

pcast1 Make a slip knot and place the loop on the needle. The strands are wound around the outside of the index finger and thumb.
pcast2 Pick up the strand of yarn on the far side of the index finger,

pulling it up and over the other one on the same finger and towards the first strand around

the thumb.

pcast3 This action will make the yarn around the index finger cross, forming a loop around the index finger.
pcast4 When the needle is past the first strand around the thumb, dip under it to hook it onthe needle. This strand will be looped on the needle from back to front.
pcast5 Pull the needle back towards the index finger slipping it between the loop around the index finger. Carefully slip the strands off the index finger and the thumb.
pcast8 Tighten the stitch by tugging on the loose ends.
pcast9 Flip the needle and start on the knit side.

Yarn Shortage

I started the ribbing for one of the sleeves and noticed that I was getting low on the Sunset Turquoise yarn. Once I got past the ribbing on the first sleeve I decide to start the other sleeve to see just how far I could get before running out. Well, I ran out on both sleeves just after the ribbing! This yarn was ordered from Europe, so I had a quick twinge of panic.
sleeverib.jpg
I really didn’t want to wait on another order. I quickly remember a yarn called “Candlelight” by YLI that I saw when first scouting yarn for this pattern at the local yarn store. I think it will work just fine. The color (medium blue 006) is a perfect match. I actually prefer it to Phildar Sunset. It’s a bit thinner, has a tighter twist, and doesn’t seem to snag as easily as Sunset.

Le Chat Méchant

latvian_mitten_toby.jpg

My vacation project is still lingering around despite being attacked by le chat méchant. Pictures usually get taken outside so that we don’t get into a brawl. Actually he’s pretty good about the knitting. It appears to be one of his favorite hobbies since he gets the leftover yarn.

This mitten design is from a book called Latvian Mittens by Lizbeth Upitis. It is one of the charts that doesn’t have instructions so, I just refer to the other samplers that do have instructions. Hopefully I can get around to finishing the mate. When I announced in a knitting class that this would be my next project the teacher mentioned that she knows many knitters who have only one such mitten. Therefore, I’m determined to get this one done (but the Phildar cardigan will get done first). I ripped the first mitten two times before getting the right fit. Once I did get the right fit, I noticed that the design wasn’t going to be properly centered. I should have adjusted the chart but I just couldn’t bring myself to rip it out one more time.

Latvians do a long tail cast-on with two strands instead of folding one strand. What a great idea. This eliminates the need to calculate or guess how long a tail should be.

I’m almost ready to start casting on the sleeves for the Phildar cardigan.

Can I …

front1.jpg
While the knitting is going quickly, I’ll have a heap of yarn ends that will need attention. I actually don’t mind dealing with them in the traditional way but I’ve been wondering if I could just sew the sweater on my sewing machine. If it works for steeks, wouldn’t it work seams? I haven’t seen this mentioned in any knitting books but I think that’s how most commercial garments are put together. I did a google search and found a posting on this site. I wanted to check Knitter’s Review but their site seems to be down.

Reference Books

I frequently “try out” books from an excellent regional library before I decide to buy. You name the knitting book, and nine times out of ten, they have a copy of it.

Deb Menz: Color in Spinning
I recently checked out Color In Spinning by Deb Menz. I can’t believe this book is out of print. Amazon has a waiting list of twelve people. I haven’t checked e-bay but I’m sure it probably fetches high bids. It is a great resource on color theory for yarn and includes extensive information about dyeing, carding and combing.

Katharina Buss: Big Book of Knitting

The Big Book of Knitting was the first knitting reference book that I purchased after I decided to take up knitting again. I was originally attracted to this book when I was learning how to make socks. It has some of the best photo instructions (on socks and other techniques) that I have found. Most of the written instructions are ok, but sometimes I find that the translation from German isn’t always clear. It seems to be one of the few books that shows a lot of advanced techniques, which I believe, are quite common in Europe.

Nancie M. Wiseman: The Knitters Book of Finishing Techniques

I recently picked up The Knitters book of Finishing Techniques. While it mostly shows just the standard lists of techniques, it does have excellent photos and descriptions. As I’ve mentioned before, I like how it describes the three-needle bind off with short rows. I also refer to it when doing a K1P2 grafted bind off.

Pok_1
I wonder if a new version of “The Principles of Knitting” will come out anytime soon.  This is another book that shouldn’t be out of print. I checked out a copy from the library and was amazed. An updated version of this book would definitely beat all the rest. Amazon has plenty of copies for sell with the lowest price being around $200. I might pay that for a newly revised edition, but for now I’ll just continue checking it out of the library.

I have some mixed feelings about Latvian Dreams by Joyce Williams. The list of techniques is excellent but the tiny digital photos are awful. It’s obvious that they put all their effort into the charts, patterns and photos of the sweaters. The back of the book has slew of charted latvian designs that would inspire anyone.

Sewing on the Collar

I decided to leave the shoulder and collar shaping on the back piece for later. I started to get curious about the ribbing around the collar and noticed the pattern refers to a page (Conseils) not included in the free version of the pattern. Similar instructions can be found on Phildar‘s website.

Instead of picking up stitches and working a collar, this pattern specifies knitting a separate band of K2P2 ribbing and then sewing it onto the sweater using backstitches. After working the band to the desired width, knit a couple of rows using a contrasting color. Position the band around the collar, placing more stitches on the front. When it comes time to sew the band to the sweater, unravel all but one row of the stitches in the contrasting color. Unravel each stitch of the last knit row while making a backstitch. More detailed instructions (in English) and pictures can be found in “Big Book of Knitting” by Katharina Buss.

knittingLang.jpg

I picked up “Knitting Languages” at my local yarn store last weekend. I noticed that there were two copies left and remembered reading on the publisher’s website that it is going out of print. This book lists knitting terms in Danish, French, German, British, Icelandic, Italian, Japanese, Norwegian, Spanish and Swedish. All are translated into American English.

I find it interesting that French has two words for stitch, “point” and “maille”. “Point” seems to be used for stitches that have already been worked and “maille” for stitches on a needle.

Shoulders

My husband took one look at what I’ve done and said, “Is that a Groovy Girls sweater?”. If you have little girls, I think you’ll understand this statement.

phil_back3A.jpg

I’m at the point where I need to start shaping the shoulders and the neck. I could follow the pattern, which specifies the typical way to bind off shoulders, or I could strike out on my own like I did last time. At this point, I’m going to admit that this is only my second sweater since taking up knitting again (a year ago). That sweater was a simple cardigan called Tea Tree. The sweater turned out great but I haven’t gotten around to taking a picture of it.

On my last sweater I used short-row shaping so that I could do a three-needle bind off. The best explanation of this technique is in “The Knitter’s Book of Finishing Techniques” by Nancie M. Wiseman. There are various resources, which describe short-rows but was the first book that I found which specifically describes how to do it on shoulders. Just to keep everything straight in my mind, I graphed it out first. I made it really complicated by doing short row shaping for both the neck and shoulders. This time around I’ll just bind off the neck without short rows. Sweaterscapes has some good tutorials about short-rows and three needle bind off.

Making Progress

The back is coming along. I’ll be starting the armhole shaping soon which might get interesting. The pattern says to decrease on each side, every two rows: 2x4sts, 2x3sts … I’m not familiar with this notation but I believe it means that the first two decreases need to be four stitches, the next two need to be 3 stitches and so forth.

I really like the format and schemas that Phildar uses. Each section of a schema has a symbol that corresponds to the written instructions.

back_phil_2.jpg

Translating the pattern hasn’t been too difficult. I found a site that translates some knitting terms and I have also used a couple of large French/English dictionaries. I was surprised to find knitting terms listed in these dictionaries.

Even though I downloaded the free version of the pattern, I went ahead and purchased it. The sizing and abbreviations are not listed in the free version.

Cast On

I went to the Oregon Flock and Fiber Festival this weekend. I found these guys snuggling despite the 98 degree weather.

Since I was out fondling fibers I didn’t get much done on my sweater. Actually I had two false starts before being satisfied with my gauge. I was trying to knit loosely but found that cotton yarn shows all flaws and the stitches were not looking uniform.

Like every other pattern out on the market, this one doesn’t mention what cast on to do. I checked a few sources and finally decided to use a regular long tail cast on for the knit stitches and a backwards version for the purl stitches. This produces a very stretchy edge.

back_phildar.jpg

Most knitting books don’t seem to mention the purl long tail cast on and I didn’t find a good reference on the web. The best written reference on this technique is in “The Principles of Knitting” by June Hemmons Hiatt. Here’s a description in my own words.

This cast on is started like the regular one. Put a slip knot in the yarn and place the loop on the needle. Place one strand of yarn around the index finger and the other strand around the thumb with the palm facing forward (The strands are wound around the finger and thumb from the palm). Once the yarn is in place, pick up the strand of yarn on the far side of the index finger, pulling it up and over the other one on the same finger and towards the first strand around the thumb (closest to the palm). This action will make the yarn around the index finger cross, forming a loop around the index finger. Once the needle is past the first strand on the thumb, dip under this strand to hook it on the needle. The thumb strand will be looped on the needle from back to front. Pull the needle back towards the index finger slipping it between the loop around the index finger. Once the needle is through the loop, slip the loop off the index finger and tighten the stitch by tugging on the loose ends.