Le cardigan rayé est fini.

phildonefull.jpg 
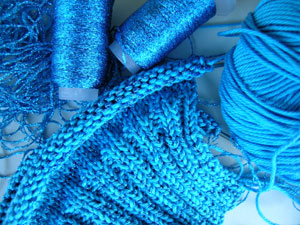
Thanks to Alison for sponsoring the Phildar Fillies knit-along. I’ve enjoyed watching the progress of other Phildar projects.

I did end up cutting 3/4″ off of each center front and finished the edge with a zigzag machine stitch. I found that my regular machine foot does have a tendency to stretch the fabric. It probably would have been a good idea to use a walking foot to minimize the stretching, but I did ok without one.

Collar

Attaching the collar was a simple process. I just followed the detailed directions in the pattern book. I pinned the collar to the outside of the sweater positioning it so that more stitches were on the front. Then I pulled out all but one row of the red stitches. The last row of red stitches was unraveled stitch by stitch as I sewed each collar stitch to the sweater with a backstitch.

Satin Hook and Eye Tape

The pattern didn’t have much detail on how to attach the hook and eye tape so I decided to handle it in the same way I hand sew a quilt binding. The goal is to fold the tape around the edge of the sweater fabric and tack it down with an invisible stitch. The top and bottom edges of the tape are hidden by folding them to the inside of the tape. I recommend using a needle with a small eye.

I started by basting (or pinning) the back half of the tape to the sweater and then carefully stitching down the tape. Once the back of the tape was secured I folded it to the front and stitched this edge of the tape to the front of the sweater. I used an invisible stitch that I taught myself and find difficult to explain but I’ll try.

I start the stitch by inserting the needle into the fold of the tape, trying not to catch either side of the tape (just a piece of the fold). After the needle catches a small amount of fabric from the fold I push the tip of the needle out. To finish the stitch, I catch a bit of fabric from the sweater, then tug the needle free and tighten the thread so the stitch doesn’t show.

Swatch Experiment

cotton_swatch2.jpg

I spent all day Friday weaving many ends of yarn into the seam allowances of my latest sweater. Now that I’ve had a chance to try it on without tons of ends hanging out, I’ve decided that I need to cut an inch off of each center front half of the sweater.

Before subjecting my newly knitted sweater to scissors, I figured I’d better try cutting up a swatch first. After dusting the sewing machine, adjusting it to produce a small zigzag stitch and sewing two lines of stitches down the center, I carefully cut between the two lines. I tested how well the stitches would hold together by tugging on the stitches. The stitches held quite well, although I did produce a bit of fringe. I wouldn’t use this technique on seam allowances but will be using it on the front of my cardigan. Fringe won’t be a problem since the edges will be covered with a very pink satin ribbon strip.

Tonight I made a special trip to the fabric store to pick up matching pink thread. While I have many spools of thread not one of them is hot pink.

Knitting Stripes

Now that I’m almost done with the sweater I just realized that I handled the stripes the wrong way. Last night I was flipping through The Principles of Knitting and noticed that the section on color techniques (page 252) talks about how to knit stripes*. The author mentions that yarn not being used for the current stripe can be carried vertically along the selvedge edge. I remember thinking about this at one point and checked some of the other reference books but didn’t find one that mentioned how to knit stripes. At this point I’m not sure what to do. I can weave in the ends but I’m also thinking about trying to bind the selvedge edges with machine stitching, almost as if I was working on a steek. I wonder if steeks are done on cotton sweaters.

* Knitting Stripes on Flat Stockinette Fabric
Carrying yarn up along the selvedge is easy when the stripes have an even number of rows but what about stripes that an uneven number of rows? Suppose I’m knitting fabric that has one row per color, won’t the working yarn end up on the opposite end of the work?

Just use the Slide technique as described in June Hemmons Hiatt’s book. Suppose, I knit the first row in one color (red) and then purl the next row with another color (white). Turn the work so the the right (knit) side is facing. At this point the red yarn is on the left side of the fabric and the white yarn on the right side. I now want to work a red row but the red yarn end is on the “wrong edge” so I can’t pick up and knit it as usual. What do I do now ? Well, since I’m using a circular needle I’ll just slide the stitches onto the left needle tip, turn the work to the wrong (purl) side and work a row of purl stitches with the red yarn. Now both the red and white yarn ends will be on the same side. The next time the working yarn is on the “wrong edge”, I can just slide the stitches along the circular needle toward the needle tip that has the desired working yarn and either purl or knit depending on which side of the fabric is facing.

Almost Done

It is finally coming together. Now I just need to fix all the yarn ends, sew on the knitted collar and then sew on the satin ribbon hook and eye tape. The yarn ends are going to be quite a job, which gets me thinking that perhaps I should have attempted to knit it in the round. Oh well, maybe next time.

phil_almostdone.jpg

As you can see, I had a little fun with Photoshop Elements today. I have almost as much fun with this program as I do knitting.

Sleeve Seam Continued …

stitch.jpg
The seam is worked in two steps starting from the top of the shoulder. Pull half of a piece of thread through to the right side of the sweater.

Take a stitch from the rows on the body of the sweater by catching the bars between stitches.

row_stitch.jpg

Then take a stitch from the sleeve by placing the needle under one knit stitch of the sleeve.

Repeat these steps until you reach the seam under the arm. Pick up the other half of the thread at the top of the sleeve and sew the other half of the seam.

supervisor.jpg

It helps to have a quality control inspector on hand.

I’m making progress on the Latvian mitten and will take photos this weekend.

Set in Sleeve Seam & Interweave Knits Update

armcap.jpg

One sleeve is now attached to the body of the sweater. Like always I looked at several books before doing this. I think “Knitter’s Book of Finishing Techniques” by Nancy Wiseman has the best description and diagram for this technique*.

This armhole is larger than the sleeve so I carefully pinned the two pieces before starting to sew the seam. I made sure to well-measured stitches, keeping in mind that I needed to fit the “large” armhole to the sleeve. Nancy’s book says that the proportion of sleeve stitches to shoulder rows is 3 to 4. I found that it was more like 2 to 4 on this sweater. Nancy’s book also mentions to start from the shoulder seam, which really works well. This makes it much easier to fit the armhole to the sleeve.

After subscribing to Interweave Knits last Saturday I asked Pam Allen if I could get the subscriber code for the new subscriber only section. She sent me one today and I just zipped through the web site a couple of minutes ago. There are quite a few free patterns (most from old issues), a sock and crochet column, an extensive illustrated glossary and “Beyond the Basics” columns.

*I don’t have Vogue Knitting.

Starting Assembly

collar_rib.jpg

pin.jpg

Saturday we went hunting for chanterelle mushrooms but could only find four. While the mushroom hunt wasn’t productive, my knitting was. I finished the sleeves and the collar ribbing for the striped cardigan. If my translation is correct, the pattern says to iron the collar before sewing it on to the sweater. I guess this might keep the stitches from unraveling but it could also melt this yarn. I started to iron the knit stitches and quickly remembered that the orange yarn is made of 50% acrylic. Luckily, I didn’t end up melting it.

The next step is to assemble the pieces by sewing on the sleeves and side seams, weaving in all the ends and then attaching the collar.

The next project will be a Christmas stocking for my mother-in-law. The pattern will be based on the lighthouse socks by Sweaterscapes but will tweak the pattern a bit. The lighthouse and landscape will be more like the one on the lighthouse sweater.

Pieces

phil_pieces.jpg
I’m working both sleeves at the same time and will soon start shaping the sleeve caps.

Check out the Morris Fern sweater on Anne Modesitt’s blog. I’ve been anxiously waiting for the winter issue of Interweave Knit ever since I saw a small preview of this sweater on her blog. Sadly, it didn’t make it into this issue but will be offered via a subscriber only link. This really bites. I don’t subscribe to any of the knitting magazines because most are not worth $6 (especially Vogue Knitting). Ok, I will admit to buying an issue for only one pattern, but kind of feel cheated when I do this. Now, they want me to plunk down $24.

Update: I decided to subscribe to Interweave Knits and sent them an e-mail letting them know that it was because of Annie’s sweater. I received a reply from Pam Allen (the new editor) and she said that they knew her sweater would be a big draw. Hopefully the new on-line content combined with the magazinewill be worth the subscription. I just hope they don’t try this with their other magazines. I doubt that I would subscribe to more then one.

Yarn Shortage

I started the ribbing for one of the sleeves and noticed that I was getting low on the Sunset Turquoise yarn. Once I got past the ribbing on the first sleeve I decide to start the other sleeve to see just how far I could get before running out. Well, I ran out on both sleeves just after the ribbing! This yarn was ordered from Europe, so I had a quick twinge of panic.
sleeverib.jpg
I really didn’t want to wait on another order. I quickly remember a yarn called “Candlelight” by YLI that I saw when first scouting yarn for this pattern at the local yarn store. I think it will work just fine. The color (medium blue 006) is a perfect match. I actually prefer it to Phildar Sunset. It’s a bit thinner, has a tighter twist, and doesn’t seem to snag as easily as Sunset.

Can I …

front1.jpg
While the knitting is going quickly, I’ll have a heap of yarn ends that will need attention. I actually don’t mind dealing with them in the traditional way but I’ve been wondering if I could just sew the sweater on my sewing machine. If it works for steeks, wouldn’t it work seams? I haven’t seen this mentioned in any knitting books but I think that’s how most commercial garments are put together. I did a google search and found a posting on this site. I wanted to check Knitter’s Review but their site seems to be down.