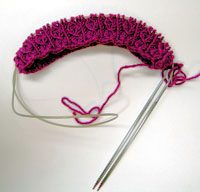
 The top down pullover is finally on the needles with a couple repeats of the mock cable stitch pattern. The pattern says to use a 16″ circular needle to start the collar but I don’t have one. I’m making due with my 40″ circular needle by using the magic loop.
How to Knit with One Circular Needle
Be sure to use a needle with a very flexible cable. I use Addi Turbo needles, which for the most part have worked wonderfully, but I have noticed that the manufacturer changed the cable material. The newest ones are not as flexible as my older ones. I won’t purchase new ones until the cables improve.
After casting on, the needle cable is folded in half to form a loop. Grab the tip of the loop and pull it out to the left side leaving the stitches on the cable. The tips of the needles will poke out of the right side. Starting the magic loop is always a little awkward, especially the first time, but becomes much easier after a few rounds have been knit.
The photo on the left shows the start of a round. Notice that the tips of the needle are on the right side and the needle cable forms a loop on the left side. Half of the stitches are on the front part of the cable and the other half are on the back part of the cable.
To position the needle tips for knitting, slide the front stitches onto the front needle tip and leave the back stitches resting on the cable. Pull the back needle tip forward a bit and position it so that the stitches on the front needle (now the left needle) can be knit onto the back needle (now the right needle) as if knitting on straight needles.
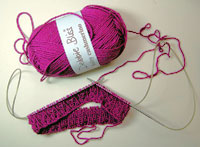 Knit all the stitches from the left needle tip onto the right needle tip. Once the first side is done flip the work to the other side so that the needle tips are again on the right side and the loop is on the left. The second half of the round can be worked just like the first half.
I learned the Magic Loop from Sarah Hauschka who helped create a booklet about this technique.


