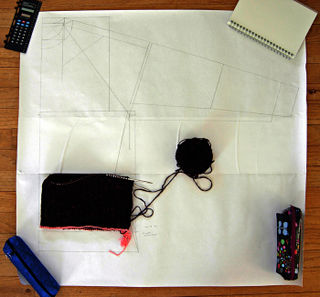
Here are notes from last night’s class as promised. It describes how to complete the whole swatch.
Swatch: Cast on 30 sts & knit 2×2 rib. Start and end with two knit stitches. Six or so rows total.
Instructions:
1. Place markers after 7th (red), 15th(white) and 23rd (blue) stitches.
(Note: In following steps I will refer to these markers by color : red, white and blue so that I don’t confuse you when you turn the piece)
2. Work in pattern to red marker and turn.
3. Work in pattern to end and turn.
4. Work in pattern to white marker (slip red marker when you get to it) and turn.
5. Work in pattern to one stitch before red marker. We’re now going to close the gap for the first buttonhole.
6. Slip next stitch purlwise to right hand needle.
7. With left hand needle pick up bar from front to back, making a new stitch on left hand needle.
8. Slip previously slipped stitch on right hand needle back to left hand needle and knit it together with stitch picked up in previous step and turn.
9. With left hand needle pick up bar (front to back) and purl this stitch with next purl stitch on left hand needle.
10. Work in pattern to blue marker (slip white marker when you get to it) and turn.
11. Work in pattern to one stitch before white marker. We’re now going to close the gap for the second buttonhole.
12. Slip next stitch purlwise to right hand needle.
13. With left hand needle pick up bar from front to back, making a new stitch on left hand needle.
14. Slip previously slipped stitch on right hand needle back to left hand needle and knit it together with stitch picked up in previous step and turn.
15. With left needle pick up bar (front to back) and purl this stitch with next purl stitch on left hand needle.
16. Work in pattern to end of swatch and turn.
17. Work in pattern to one stitch before blue marker. We’re now going to close the gap for the last buttonhole.
18. Slip next stitch purlwise to right hand needle.
19. With left hand needle pick up bar from front to back, making a new stitch on left hand needle.
20. Slip previously slipped stitch on right hand needle back to left needle and knit it together with stitch picked up in previous step and turn.
21. With left needle pick up bar (front to back) and purl this stitch with next purl stitch on left hand needle.
22. Work in pattern to end of swatch. Buttonholes are now complete.
23. Finish swatch by working several more rows in pattern and bind off.

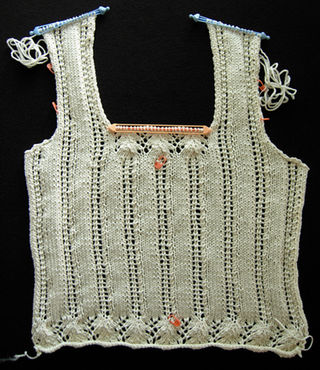
 I’ve bypassed the dolman project in favor of getting the raglan homework done for our next class (in a couple of weeks). I thought about adding a fancy cable down the center but since I never seem to have much time lately I decided to go with an very easy stitch pattern.
 Front, back and sleeves are done. Waiting for sleeves to dry and then I need to figure out what to do with the provisionally cast-on edges before sewing the seams.
 Just got back from a 10 day trip to Japan – six days in Kyoto, three days in Takayama and two in Osaka.
 Next stop was a craft store in the basement of Kyoto Tower called
  Later that night when pulled out the set of knitting needles I noticed that the set only included even numbered needles (4 – 14). How crazy is that! I really wanted a whole set including the odd sized needles. Darn it! The next evening I returned to pick up all the odd sized needles.
 In case you’re wondering, the reason I wanted a full set of needles from Japan is that they come in a different size range than what is available in North America or Europe. Check out this
 The yarn for the dolman sleeved sweater arrived yesterday, that’s two days before class starts again.
 We got our homework assignment a couple of days ago. Swatches for the next two garments; one with puffy sleeves and the other with dolman sleeves.
 Finally got out my wheel and finished plying this roving that was spun last year. I tried to control the color by splitting the roving lengthwise, hoping I’d end up with my own Kauni type yarn. No such luck.
You must be logged in to post a comment.