Rolling along

It was another weekend of NV classes with Jean.

What did we do?
v-neck pullover:ribbing
Saturday:
The v-neck pullover was suppose to be finished except for the ribbing around the neck. I hit a snag with the lower ribbing and was only able to seam the shoulders.

In class we reviewed picking up stitches, discussed lining up the rib stitches to fit around the center knit stitch(es) and figured out the rate of decrease for the center stitch.

Jean also checked our round-neck cardigan graphs that indicate the armhole, neck and sleeve cap decreases.

v-neck cardi swatch
Sunday:
In the morning we drew the button band onto the v-neck cardigan pattern and learned a few details about adding darts.

In the afternoon we got feedback on whether our yarn and stitch pattern choices were suitable. Jean then covered invisible cast ons.

I wish I had more time to give a detailed account but I’ve got a pile of laundry waiting for me.

A great beginning

The fourth project, a round neck cardigan, was started this week.

Previously Jean had us do a provisional cast on and work the rib after the pieces were finished. However, this time I’m working the rib immediately after doing an invisible cast on. That ‘ so my 2×2 rib will correctly line up with the stitches in the pattern.

Unfortunately, I didn’t do this with the v-neck pullover and now have the daunting task of figuring out how to graft the ribbing to each piece.

Although Jean didn’t teach this cast on technique in class I was able to easily follow her instructions on the DVD.

It’s really quite simple. Here are a few photos of the process.

Inv_cast_on1_4

Start with a provisional cast on from a crochet chain and knit a few rows.

invisible cast on 2

Start ribbing …

Alternate between,

1. Purl two stitches on left needle
2. Pick up and knit stitches from crochet chain (horizontal bumps) twice.

invisible cast on 3

After working a few rows undo crochet chain and pull out waste yarn.

invisible cast on 4

What a beautiful and easy beginning.

Left to do:
– finish round neck pullover
– v-neck ribbing, blocking and sewing
– round neck cardigan back and right front
v-neck cardigan swatch

…so much to do and so little time.

v day

v-neck front completeIt now ready for the ribbing around the torso and the arms.

Instead of picking up stitches from the provisional cast-on , I’ll be knitting the band separately and then grafting it onto the garment.  This is all in a effort to get the single knit stitches in the pattern on the body to line up with the ribbing stitches.

Yes it would have been much easier to start off with ribbing but …

This week I’ll be working on new arms for the round neck pullover. Turns out that the 3/4 length sleeves are just too short and too tight.

Round neck cardi

The fifth garment must be started soon. Here’s my swatch for that. Good old Cascade 220 Heathers.
This one will became a round neck cardigan.

Looking forward to finding out what Jean does with buttonholes.

Deep v

v neck frontv neck back

Almost completed the first side of the V, but guess what?

Yes, I’m going to rip back to the under arm bind offs.

I forgot to decrease an extra stitch on the first set of armhole bind offs. You see, the front has two more stitches than the back so that the stitch pattern lines up correctly at the side seams. If I don’t decrease the extra stitches then the pattern won’t match at the shoulders.

Yes, that is being picky but hey, I think I’ve always been part of the slow knit movement.

Got the latest JJill catalog the yesterday. Looks like one of their designers is having fun with his/her Japanese stitch pattern books. Check out this pullover.

Only 11 more days until Madrona Fiber Arts Winter Retreat!

Design Notes

v-neck notes

Our final task for each garment is to add it to our “design note” book and let Jean review it along with our  garment.

Here’s my entry for the vest.

Besides reproducing a 1/4 scale drawing of the pattern we also note gauge, needle size, measurements and add a photo.

I followed the format found in many Japanese knitting books. Essentially, most of the details needed to knit the garment can be found within the chart. That includes measurements, stitch/row counts and decrease notations.

Japanese books always note decreases in the same format: rows – stitches – times. Read these notations from bottom to top as if knitting the garment. For example here are my decreases for the shoulder slope.
2-4-1
2-3-1
2-4-3

This “design note” book and 1/4 scale ruler was supplied by Jean and came from Japan.  Each page is a 1/4 scale grid with every square representing 1cm. We draw our chart using a special 1/4 scale ruler which also includes .5cm marks as well as 1cm marks.

I don’t think this handy booklet is available in the US.

By the way, I enjoy working in the metric system and can’t understand why the US doesn’t dump the Imperial system.

Oh my

Round neck sleeve sewnI’m trying not to feel too overwhelmed.

Two more class sessions = tons more homework.

Full of enthusiasm, I picked up the round neck pullover on Monday evening.

Once again this darn panda cotton made a relatively simple task turn into an ordeal. Its tiny plies easily unravel and then mysteriously squish together further down the piece of yarn I used to crochet the sleeve to the body. Yes, I should have used a different yarn for seaming but, heck, I want to use up the left overs.

Speaking of left overs. I have seven more skeins of this panda cotton!

I’m a bit puzzled as to how this happened. I expected one or two extra skeins, but seven? I used The Knitter’s Handy Guide to Yarn Requirements  when buying the yarn so, either I inadvertently looked at the wrong figure in the pamphlet or their estimates are much too generous. Whether or not I made a mistake, I still think their charts are very generous. I do recall having two extra skeins left over after finishing my raglan.

v-neck sleeve with cap

After Monday the homework pace slowed down.

I did manage to sort through my notes and gather all my calculations on the raglan sweater so that I can start working on my “design notes” booklet. This is a thin paper notebook that was provided on the first day of class and will be used to jot down the final details of each project. Now that we’ve finished a couple of garments, Jean has asked us to turn in our first two projects along with our design notes. I’ll post a picture of this “design notes” notebook when I get the first entry finished.

Although I had more company this weekend I managed to get one of the sleeve caps of the v-neck sweater done. I know it looks odd but keep in mind that it’s not blocked yet.

Knitting against the clock

v-neck: sleeves

Only five days left before our next session.

On the knitting front I have about 2/3 of the other sleeve piece to finish. These twisted stitches are tough on the old fingers.

As far as the seam stitch goes I decide to have one knit stitch on each side. Hopefully this will be ok with sensei.

Yet to do:
– grids on v-neck pattern pieces
– block top-down raglan
– undo side seams of vest to leave ribbing seam undone


Look what finally arrived in the mail this weekend. Vintage Knitting in Tradition
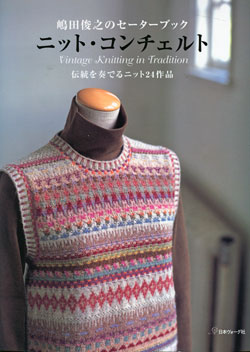
Toshiyuki Shimada’s latest book. It’s packed with so many enticing garments one hardly knows where to start. I was planning to  do a review but a fellow ravelry knitter already posted this excellent review on her blog.

One word of caution though. I found out yesterday, via this ravelry post that the first edition is being recalled by the publisher and a second edition is being printed now. In case you got the first edition, here’s the errata. Download the pdf files to find corrected charts.

Also via the same raverly post someone mentioned that The Needle Arts Book Shop is now carrying Japanese books.

Well, I’ve got to get back to that homework now.

On the flip side

v-neck flip side The flip side is done. Sleeves will be cast on today after a bit of head scratching yesterday.

We’ve learned how to calculate increases from the wrist to the underarm – that’s no problem. We’ve learned how to sew seams between stockinette stitches. What I don’t quite get is how to handle increases when using a stitch pattern. Is the edge stitch still done in stockinette? What happens if the increase stitch falls in an awkward place in the pattern stitch? Mine has some twisted stitches.

Not quite sure about these questions. I’ll just cast on and give it a shot. After all, I can always rip it out later.

Over the Christmas holidays several family members asked about the red string at the bottom. I thought I’d mention it in case others might wonder. It’s a provisional cast on. When the top half is finished I’ll pull out the red string and put these stitches on a needle and then work the ribbing from there down. So, no, the red string is not part of the design.

Autumns

And for something different …

….  Campion / Spindrift trivia

There’s not just one autumn.

To the right (in the hank) is autumn #5. Perhaps the original autumn?

Top left is autumn #261. One that is found on many AS color cards.

Bottom left is autumn #1100. Looks a lot like the Shetland Heathered Aran color called hairst. If only it was produced in Spindrift as well. What a lovely complex color. Hairst is another word for autumn (according to the Shetland Museum’s website).

School of hard knocks

Vest doneHere’s the second project from the Nihon Vogue class.

This photo doesn’t show how wide the vest is around my hips. In fact I was holding some of the extra ease behind my back with my right hand.

Judging ease has got to be one of the hardest parts of this class. When we drew this pattern we were told to add our desired ease. At the time I wasn’t sure what my desired ease should be and I don’t think I was the only student with this dilemma. I couldn’t help but think, if only I had measured all my favorite sweaters before hand.

Oh well, I guess it’s a good learning experience.

Now I know from experience that an item made from sport weight wool doesn’t need as much ease as something knitted in a worsted weight wool and I’ve got to be careful when adjusting the pattern to fit my hips.

Jean suggested that our side seam could be a straight vertical line between the armhole to the hips or if we have hips that are larger than the bust, add ease at the hips, draw a line from the hips towards the waist line and then draw a straight line from the waist to the armhole. I took the second option when I should have taken the first.

For my figure I think it’s best to measure the circumference of my torso where the garment will fall, add a tiny bit of ease and then draw my side seam line straight up to the armhole. At least that’s what I’ll do with the v-neck pullover.

Here’s a photo of the next project in the queue, a round-neck pullover. It’s ready for the arms to be sewn to the body, ribbing added to the collar and finishing touches to the ribbing on the arms and waist. We’ll be covering that in the next class.
Round-neck sewn

By the way, this Panda cotton yarn is a pain to use when sewing side seams. The twist easily falls apart during seaming and the individual untwisted strands tend to bunch together into unruly clumps making seaming very unpleasant task.

Oh, and for those interested in that stitch pattern in my last post, it’s from 1000 Knitting Patterns Book.